Use this guide to publish a simple booking page first. You can add payments, themes, and deeper settings once the core booking flow works.
1. Create your account
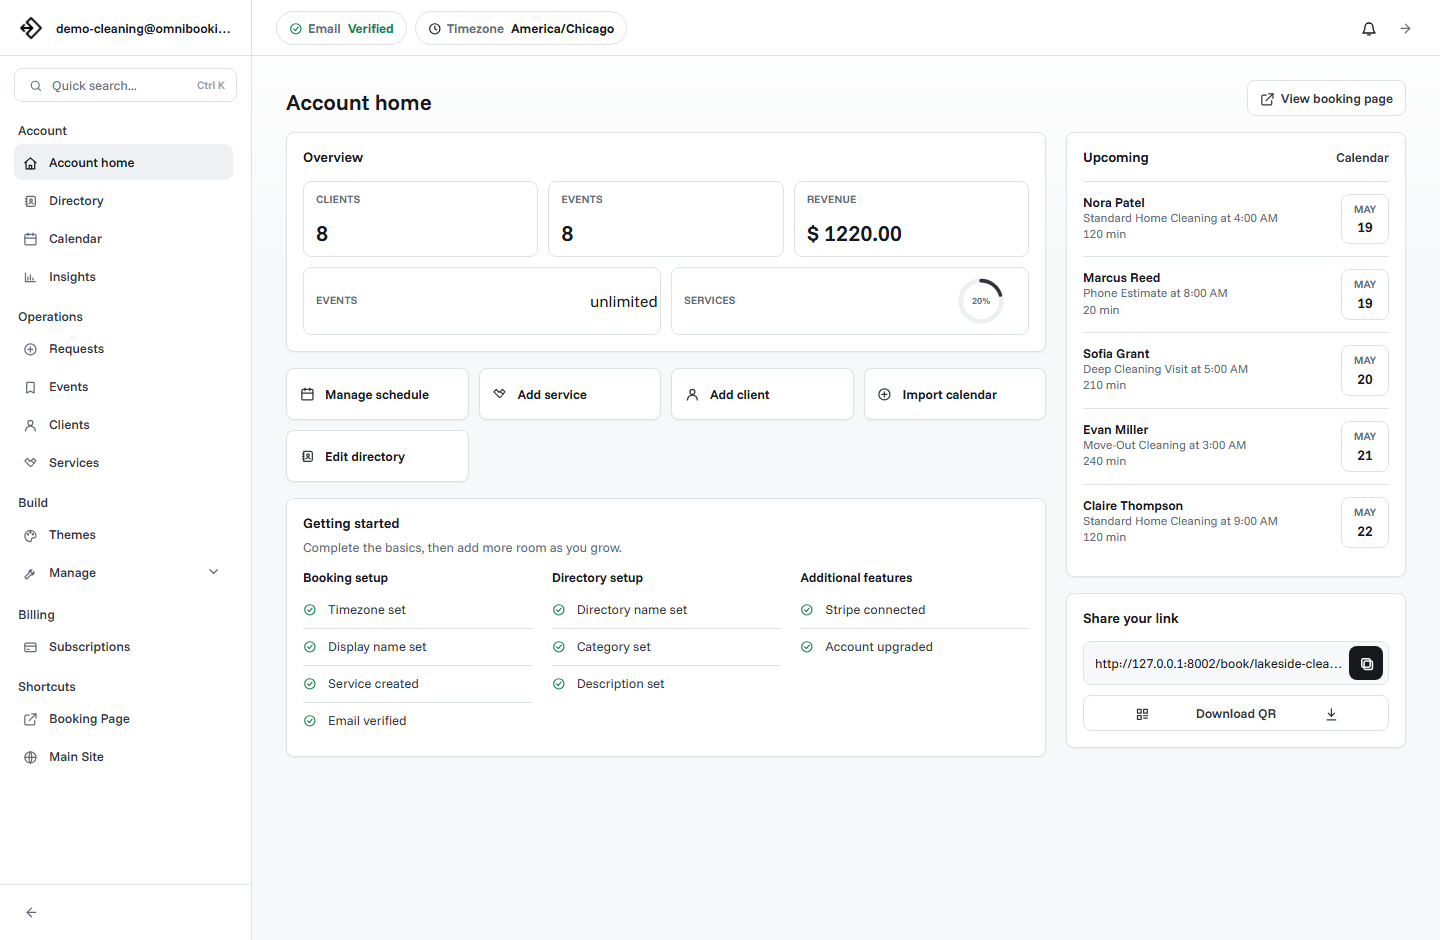
Start by creating an Omnibooking account with the email address you want tied to your business. After signing in, the dashboard becomes the place where you manage your booking page, services, clients, events, and settings.
- Your account email is correct.
- You can access the dashboard.
- Your business name is ready to use on the booking page.
2. Set your booking page basics
Your booking page is the public link clients use to book with you. Keep the page name clear and recognizable, then choose a booking URL you can comfortably share in messages, social profiles, and printed materials.
3. Add your services
Create the services clients should be able to book. Each service should have a plain name, accurate duration, and enough detail for clients to know what they are choosing.
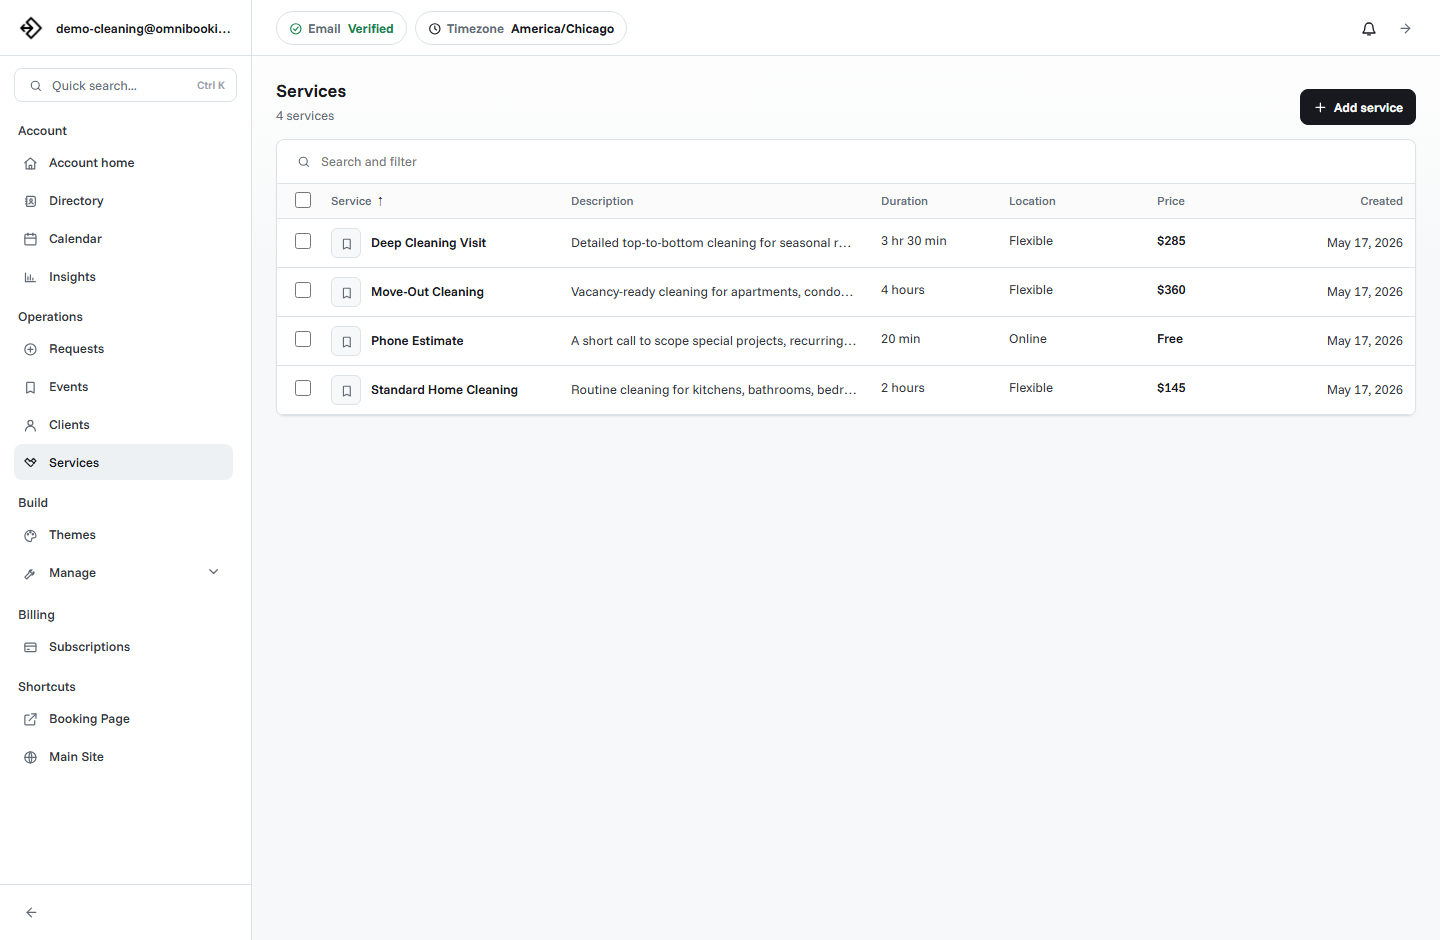
Name
Use labels clients already understand, such as Consultation, Deep Clean, Portrait Session, or Private Training.
Duration
Set the real amount of time you need, including prep, cleanup, or transition time when it matters.
Price
Show a clear price when it helps clients decide. Use Stripe Connect later if you need payment during booking.
4. Set your availability
Availability controls when clients can book. Add the hours you want open, then block out breaks, travel time, admin time, or anything else that keeps your day realistic.
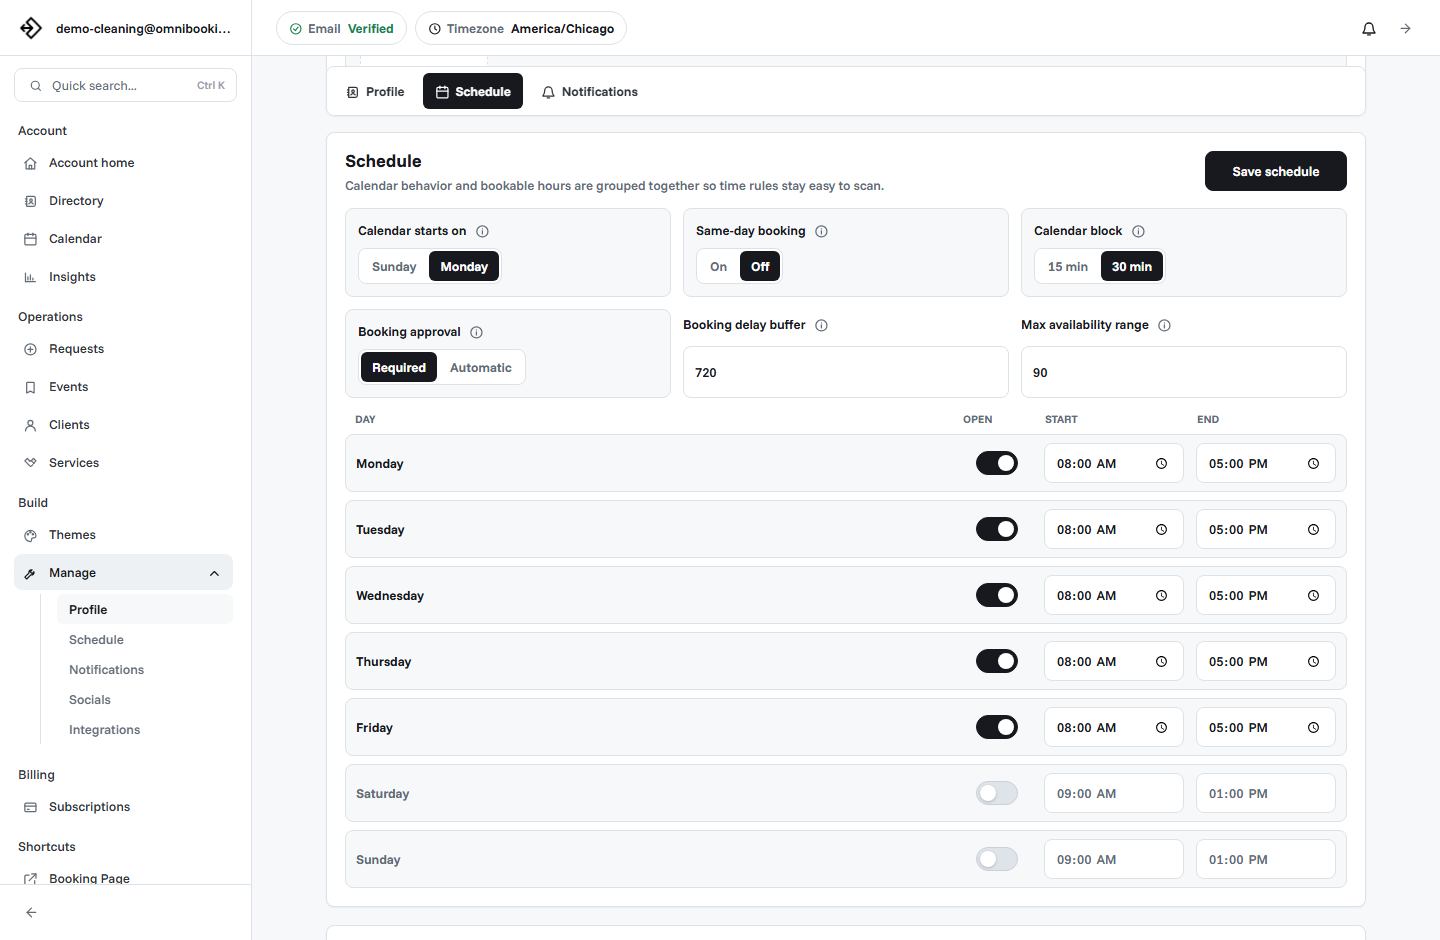
- What days do you accept bookings?
- What hours should be visible to clients?
- Do you need breaks between appointments?
- Should clients be allowed to book last minute?
5. Test the client flow
Before sharing the link widely, open your booking page like a client would. Choose a service, pick a time, enter client details, and confirm that the flow makes sense from start to finish.
6. Share your booking link
Once the page is ready, place the link where clients already look for you. Start with the channels you actively use and add more over time.
Website
Add the booking link to your contact page, service page, or primary call-to-action button.
Social profiles
Use the link in profile bios, pinned posts, direct messages, or story highlights.
Messages and QR codes
Send the link directly or put it behind a QR code for flyers, cards, signs, or in-person events.
7. Add payments when needed
If you need deposits, paid appointments, or stronger booking commitment, connect Stripe from your integration settings. Keep the first payment rule simple and test it before using it with real clients.
Related resources
Online Booking Checklist
Use the checklist after setup to catch missing services, availability, and testing steps.
How to Create a Booking Page
Refine the public page copy, service choices, and booking flow.
Set Booking Availability
Dial in working hours, booking delay, and blocked time before launch.
Stripe Connect Setup and Fees
Connect payment only when fixed-price services need deposits or prepayment.
Frequently Asked Questions
Find quick answers about setup, booking pages, reminders, payments, and plans.