How to Create a Customizable Booking System for Your Business with Omnibooking
5 minute readCreating an efficient booking system is essential for service-based businesses looking to streamline their appointment scheduling process. Omnibooking provides a comprehensive platform designed specifically for small business and service providers to quickly establish an online booking presence and manage client appointments effectively.
Understanding Omnibooking's Core Platform
Omnibooking is a booking platform that enables small businesses and service providers to create professional booking pages and manage client appointments online. The platform offers a complete solution that eliminates the need for complex technical setup while providing robust customization options.
The system caters to various industries, including photographers, cleaning services, and numerous other service-based businesses. Understanding why every small business needs an online appointment calendar helps establish the foundation for implementing an effective booking system.
Setting Up Your Customizable Booking Page
The booking page serves as the primary interface between your business and potential clients. Omnibooking provides theme selection options that allow you to customize the appearance of your booking page to match your brand identity. You can upload your business logo to maintain consistent branding throughout the booking experience.
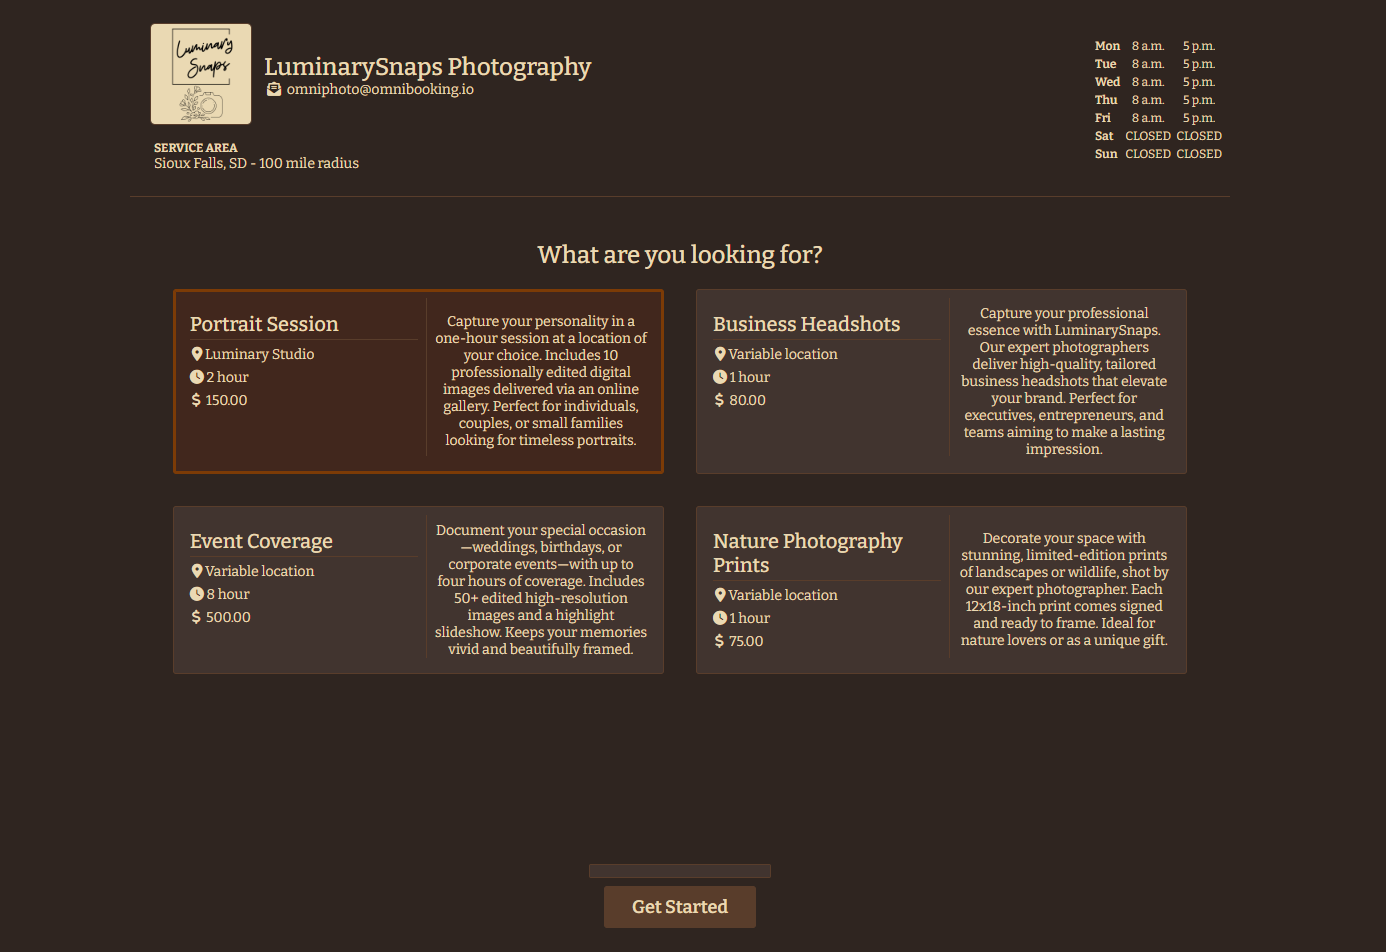
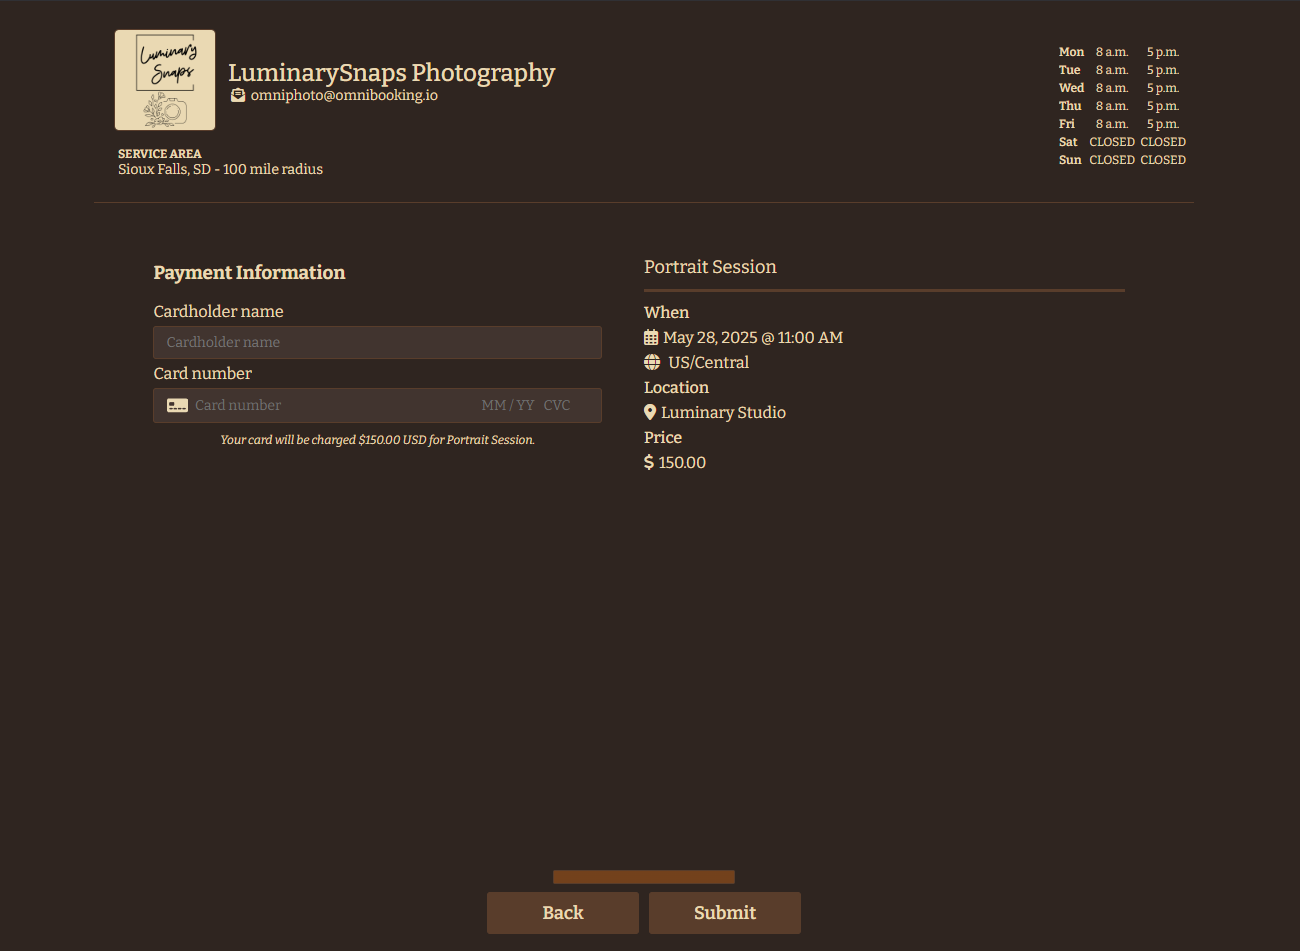
The booking process follows a structured four-step approach. Clients begin by selecting their desired service, proceed to choose available dates and times, input their information, and complete payment if required. This streamlined process ensures a smooth user experience while capturing all necessary booking details.
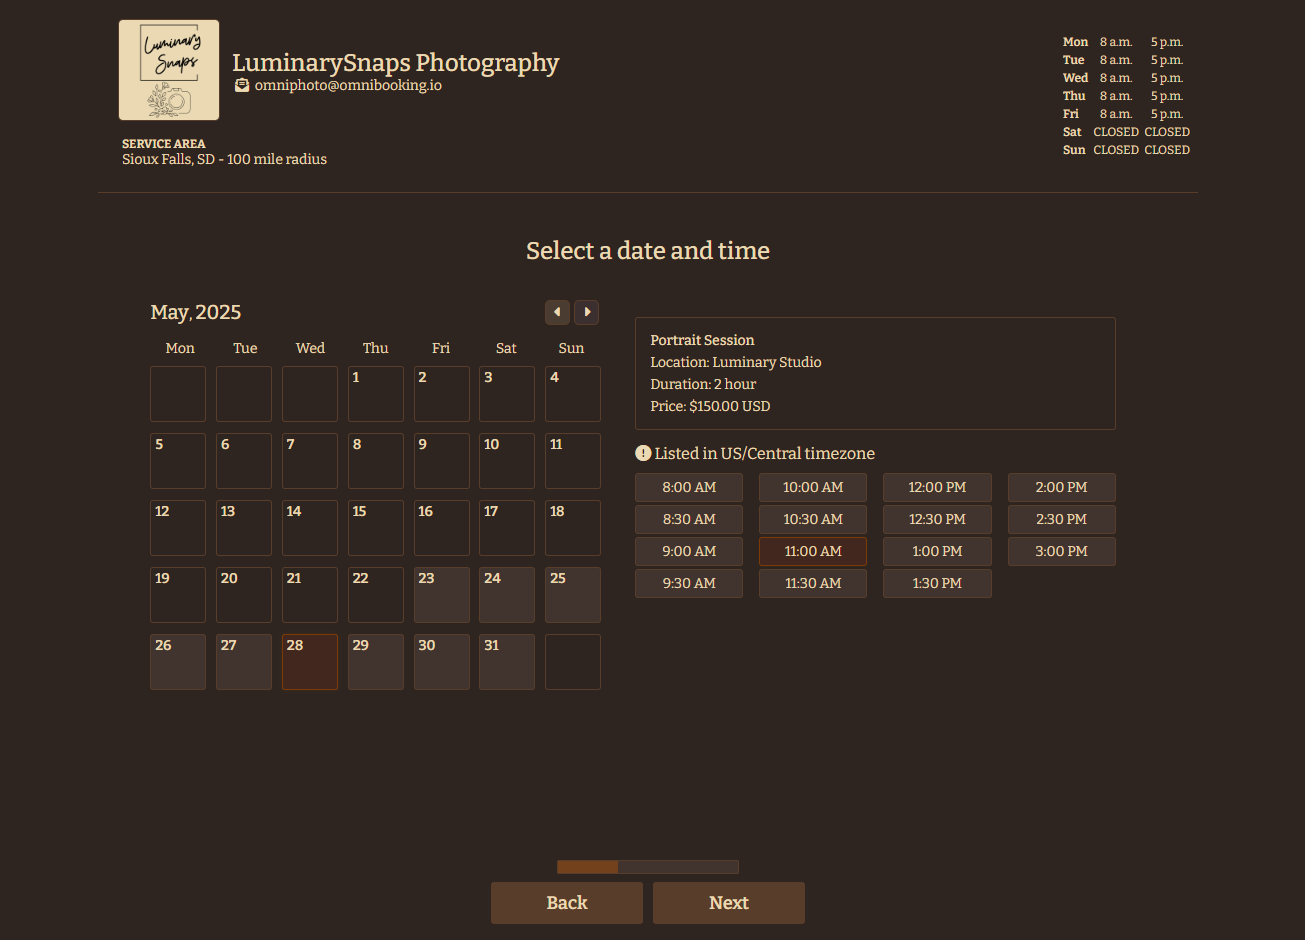
Configuring Service Options
Omnibooking supports both variable location services and variable priced services. Variable location services allow clients to enter their specific location during the booking process, making it ideal for businesses that provide on-site services. Variable priced services enable price negotiation outside the Omnibooking platform, providing flexibility for custom quotes and specialized services.
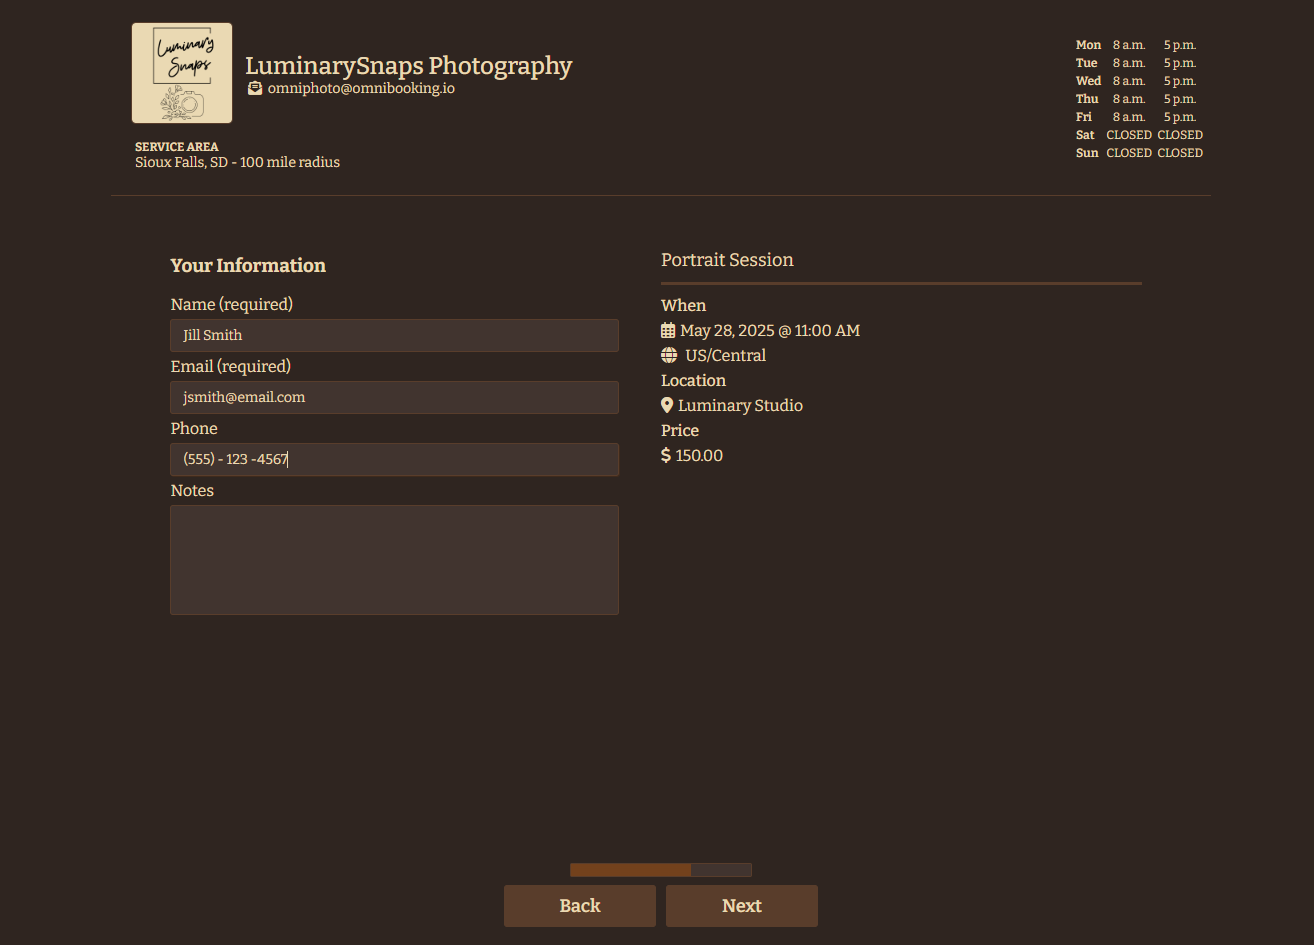
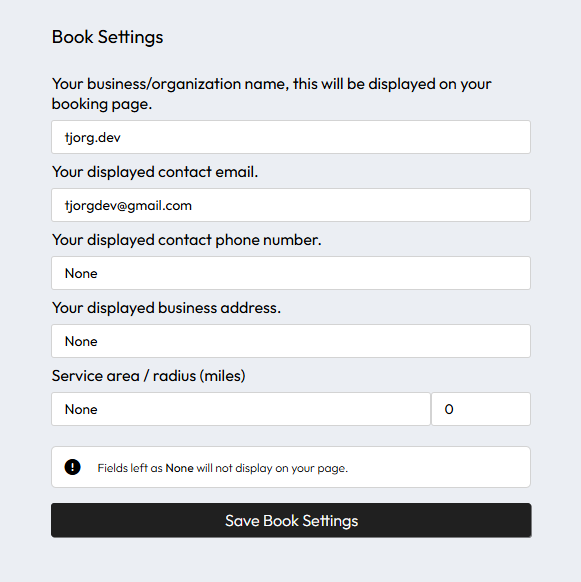
The platform displays service areas on your booking page, helping clients understand your coverage zones before initiating the booking process. This feature reduces confusion and ensures that only qualified leads proceed with appointments.
Implementing Payment Integration
Omnibooking integrates with Stripe Connect to enable paywalls on your booking page. This feature allows you to collect payments at the time of booking, reducing no-shows and ensuring commitment from clients. The payment integration is seamlessly incorporated into the booking flow, maintaining a professional appearance throughout the process.
For businesses considering different platforms, reviewing an Omnibooking vs. Acuity Scheduling comparison or an Omnibooking vs Calendly comparison can help validate your platform choice.
Managing Your Business with the Dashboard
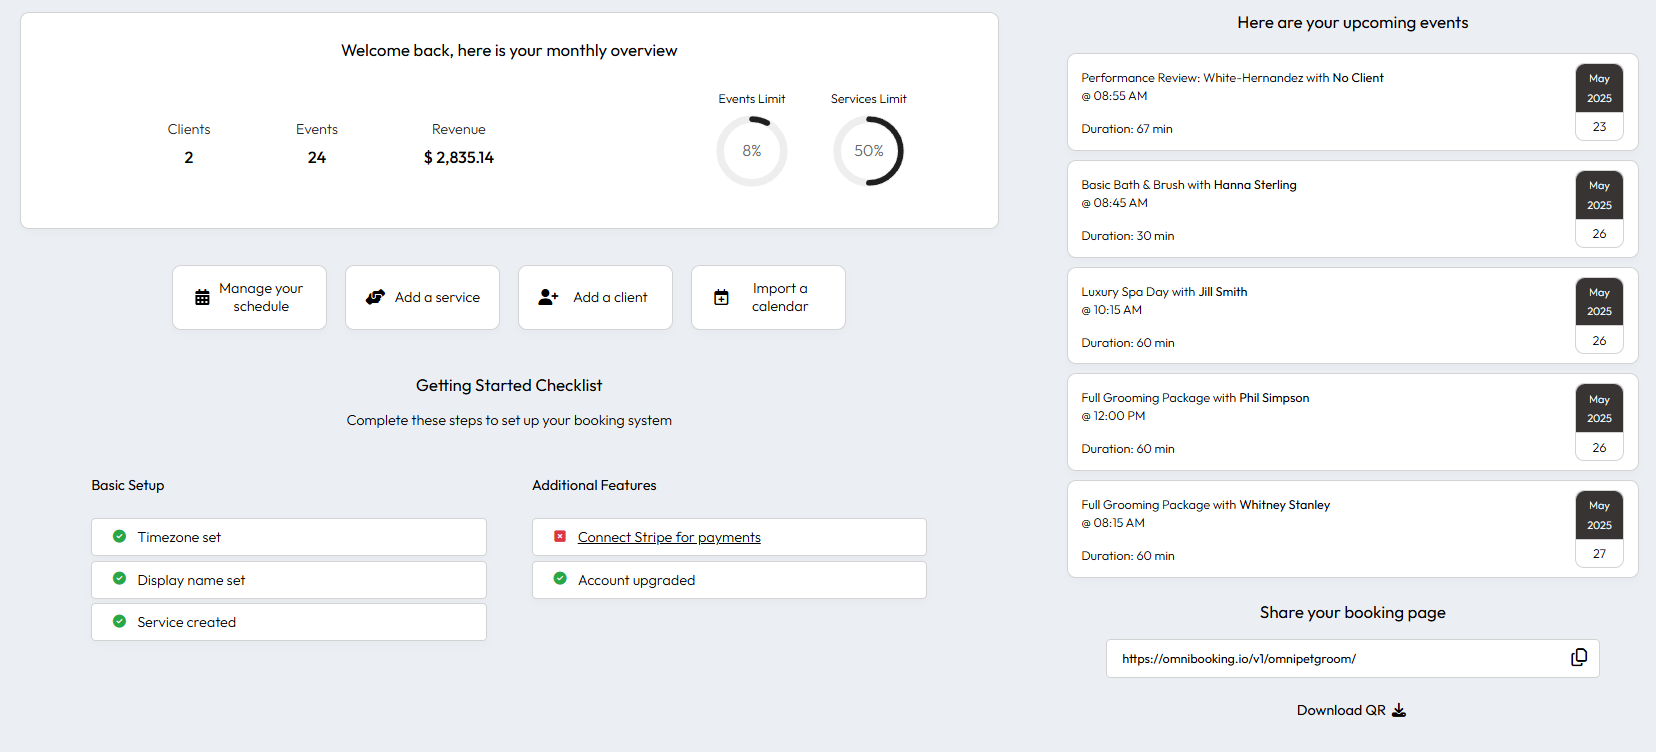
The modern dashboard provides comprehensive analytics, calendar views, and management tools essential for running your booking system effectively. The dashboard serves as your central command center for monitoring appointments, analyzing booking patterns, and managing day-to-day operations.
Calendar Management
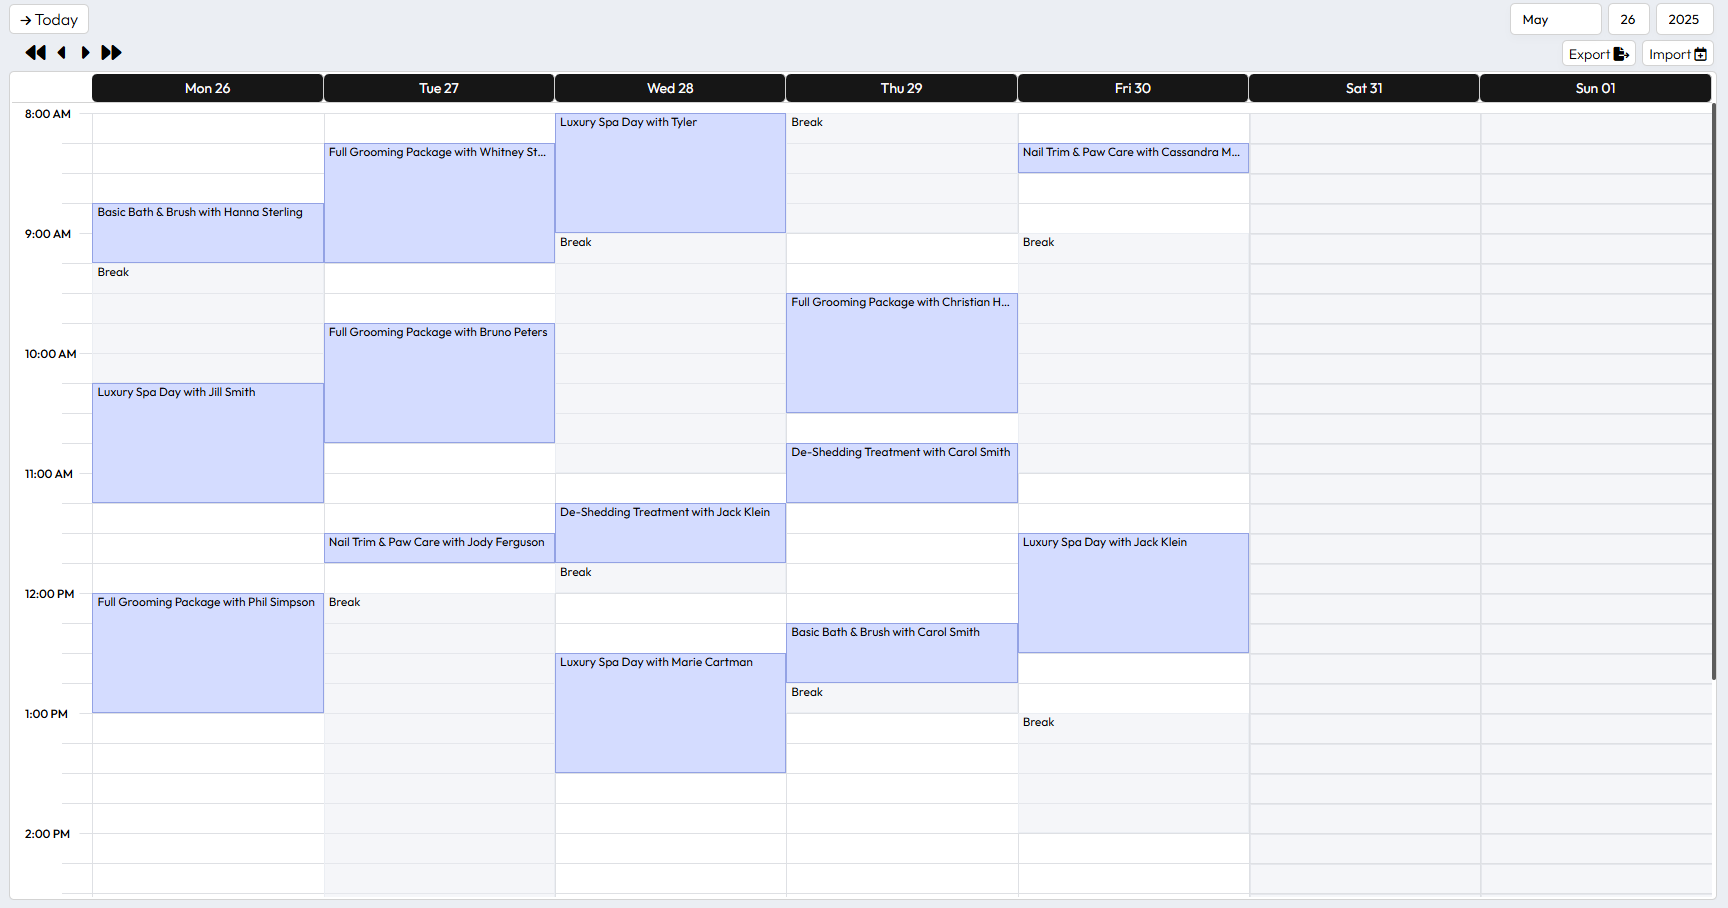
The integrated calendar view displays all your appointments in an easy-to-read format. You can quickly identify busy periods, available slots, and upcoming appointments. The calendar supports ICS import and export functionality, allowing integration with external calendar systems.
Quick Actions and Efficiency Tools
Quick actions menu provides rapid access to frequently used functions, streamlining your workflow and reducing the time required for routine tasks. These efficiency features help you focus on delivering quality service rather than managing administrative details.

Configuring Availability and Scheduling
Proper availability management forms the backbone of any successful booking system. Omnibooking provides comprehensive availability management tools that include support for intraday breaks, ensuring your schedule accurately reflects your actual availability.
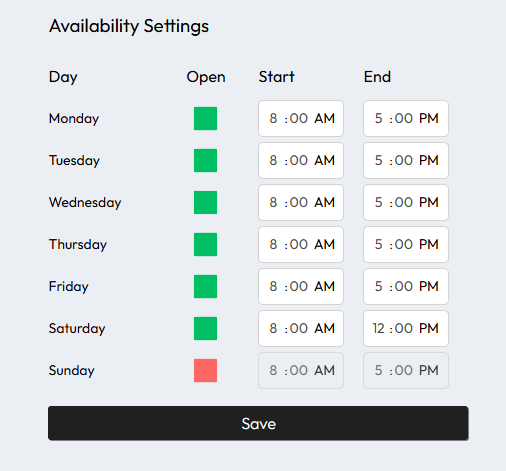
The availability settings allow you to define your working hours, block out unavailable periods, and set buffer times between appointments. This granular control ensures that your booking system aligns with your actual capacity and working preferences.
Automating Client Communication
Effective communication reduces no-shows and enhances client satisfaction. Omnibooking offers both automated and manual reminder options, allowing you to choose the approach that best fits your business style and client preferences.
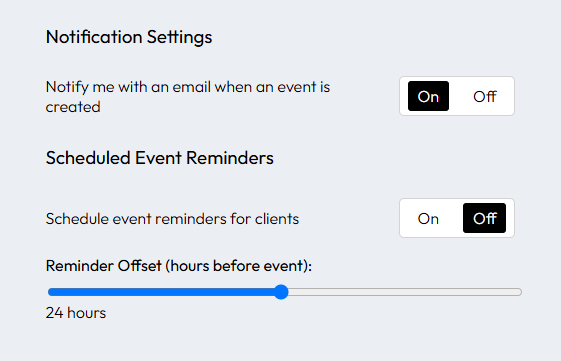
The system generates ICS attachment emails that facilitate easier event calendar integration for your clients. When clients receive booking confirmations, they can easily add the appointment to their personal calendars, reducing the likelihood of missed appointments.
Promoting Your Booking System
Omnibooking generates QR codes for your booking page, enabling easy sharing and access for potential clients. These QR codes can be incorporated into marketing materials, business cards, or displayed at your physical location to drive online bookings.
The platform's design ensures that your booking page is mobile-friendly and accessible across different devices, maximizing the potential for bookings regardless of how clients access your services.
Maximizing Your Booking System's Potential
Understanding 10 ways Omnibooking helps service providers succeed can help you leverage all available features effectively. The platform's comprehensive feature set supports business growth while maintaining simplicity in daily operations.
Regular analysis of your booking analytics helps identify trends, peak booking times, and client preferences. This data-driven approach enables you to optimize your availability, adjust pricing strategies, and improve overall service delivery.
Conclusion
Creating a customizable booking system with Omnibooking involves leveraging the platform's comprehensive feature set to match your specific business requirements. From initial setup and customization to ongoing management and optimization, the platform provides the tools necessary for efficient appointment scheduling and client management.
The combination of customizable booking pages, integrated payment processing, comprehensive dashboard analytics, and automated communication tools creates a robust foundation for managing your service-based business. Success with your booking system depends on proper configuration, regular monitoring, and continuous optimization based on client feedback and booking patterns.